What causing underground leaks
Underground leaks can be caused by a variety of factors, ranging from natural processes to human activities. Identifying the underlying causes of these leaks is essential for both prevention and effective repair. Here are some common reasons for underground leaks:
- Corrosion: Over time, pipes can corrode due to exposure to water, minerals, chemicals, and soil conditions. Corrosion weakens the pipe material, leading to cracks, holes, and eventually leaks.
- Age: Older pipes are more susceptible to deterioration and wear. Many underground water systems still use pipes that have surpassed their intended lifespan, making them prone to leaks.
- Ground Movement: Soil shifting, settling, or seismic activities can place stress on pipes, causing them to crack or break.
- Freezing and Thawing: In colder climates, freezing temperatures can cause water inside pipes to expand, potentially leading to pipe bursts and leaks when the ice thaws.
- Soil Conditions: Highly acidic or alkaline soils can corrode pipes more rapidly. Additionally, soil movement or changes in soil density can stress pipes and cause leaks.
- Pressure Fluctuations: Rapid changes in water pressure within the pipes can weaken their structure and lead to leaks over time.
- Tree Root Intrusion: Tree roots are naturally drawn to sources of water, and they can infiltrate pipes in their search for moisture. As roots grow, they can cause cracks or blockages in pipes, eventually leading to leaks.
- Poor Installation: Incorrect installation techniques or the use of subpar materials can create weak points in pipes, making them more susceptible to leaks.
- External Damage: Construction work, excavation, or other activities near underground pipes can accidentally damage them, leading to leaks.
- Water Quality: Water with high mineral content or certain chemicals can accelerate the corrosion process, increasing the likelihood of leaks.
- Localized Stress: Physical stress on pipes due to external factors like heavy traffic, nearby construction, or even vehicle vibrations can contribute to pipe deterioration and leaks.
- Electrolysis: When dissimilar metals are used in close proximity within a pipe system, an electrolytic reaction can occur, accelerating corrosion and potentially causing leaks.
- Manufacturing Defects: Pipes with manufacturing flaws or imperfections may develop weaknesses that lead to leaks over time.
- Abrasion: The movement of rocks or debris against pipes, especially in areas with high water velocity, can gradually wear away pipe material and create leaks.
- Chemical Reactions: Certain chemicals present in the soil, water, or the surrounding environment can react with the pipe material, weakening it and causing leaks.
Understanding these potential causes of underground leaks is crucial for implementing preventive measures and carrying out effective repairs. Regular maintenance, choosing appropriate pipe materials, and monitoring the condition of underground infrastructure can all help mitigate the risk of leaks and the subsequent damage they can cause.
How to fix underground leaks?
Underground leaks can pose significant challenges, causing damage to property, increasing water bills, and even undermining the stability of structures. Whether it’s a leak in a residential yard, a municipal water line, or an industrial setting, timely detection and effective repair are crucial to prevent further damage. In this guide, we will explore the steps involved in identifying and fixing underground leaks, ensuring a swift and successful resolution.
Step 1: Detection and Assessment
The first and most critical step in fixing an underground leak is identifying its location accurately. Several methods can aid in leak detection:
- Visual Inspection: Look for signs of water pooling, unusually lush patches of grass, or sinkholes. These can indicate an underground leak.
- Pressure Tests: For larger systems, pressure tests can help identify drops in pressure that might indicate a leak.
- Acoustic Listening Devices: Professionals use these devices to listen for the sound of escaping water, helping pinpoint the leak’s location.
- Thermal Imaging: Temperature anomalies in the ground can be indicative of water leaks. Thermal imaging cameras can aid in locating these variations.
Step 2: Gather Tools and Equipment
Once the leak’s location is determined, gather the necessary tools and equipment. This may include shovels, digging tools, pipe cutters, replacement pipes, pipe fittings, sealants, and safety gear like gloves and goggles.
Step 3: Safety First
Before digging, it’s essential to ensure that utility lines are clearly marked. Call your local utility locating service to identify the location of gas, electricity, and other utility lines to avoid accidents.
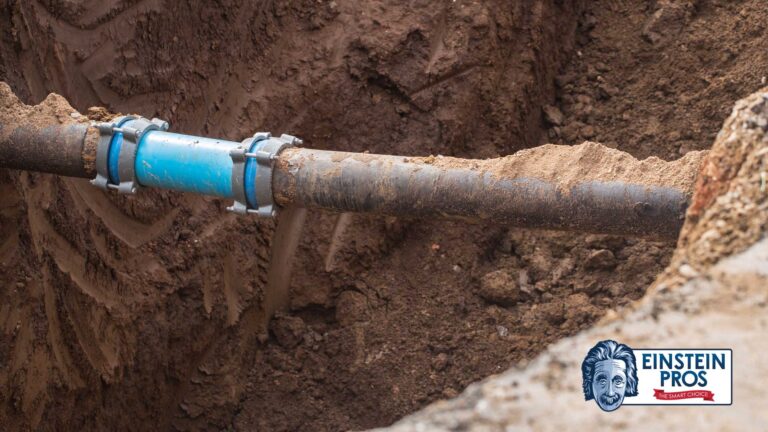
Step 4: Digging and Accessing the Leak
Carefully excavate the area around the leak. Depending on the extent of the leak and the pipe’s depth, this may be a relatively straightforward process or a more complex excavation.
Step 5: Repairing the Leak
The method of repair depends on the type of pipe and the extent of the damage. Here are two common scenarios:
- Minor Leaks: For small cracks or holes, you can use epoxy putty or specialized pipe repair tape. Clean the area around the leak, apply the putty or tape, and allow it to cure as per the manufacturer’s instructions.
- Major Leaks: If the damage is extensive, you may need to cut out the damaged section of pipe and replace it with a new segment. Ensure the replacement pipe matches the material and dimensions of the existing pipe. Use appropriate connectors and fittings to secure the new pipe in place.
Step 6: Test the Repair
After making the necessary repairs, it’s crucial to test the system to ensure the leak is fully resolved. Turn the water back on gradually and monitor the repaired area for any signs of leaks or pressure drops.
Step 7: Backfill and Restoration
Once you’re confident that the repair is successful, carefully backfill the excavation site. Compact the soil as you go to prevent settling. Finally, restore the area to its original state, whether it’s a garden, lawn, or pavement.
Step 8: Preventive Measures
To minimize the risk of future underground leaks, consider these preventive measures:
- Regular maintenance of water lines and pipes.
- Monitoring water bills for unexpected increases, which could signal a hidden leak.
- Proper insulation to prevent freezing and thawing damage in colder climates.
- Avoid planting trees or large shrubs near water lines to prevent root intrusion.
Fixing underground leaks requires careful detection, precise excavation, and skilled repair. While minor leaks can often be resolved with simple solutions, major leaks demand more extensive repairs and replacements. By following these steps and taking preventive measures, you can address underground leaks effectively and ensure the integrity of your water systems and property. If you’re unsure about the complexity of the repair, it’s always wise to consult professionals to ensure a successful resolution.